

Every business undergoes a major transformation wherein the integration of different systems like CRM, ERP, and internal/external channels occur. This is done to achieve better traceability, transparency, and real-time insights. To maintain the eventual consistency of data across components, we needed a more reliable and stable configurable job scheduler considering 20+ runbooks (or distinct Jobs) running at different configurable frequencies.
Having looked at different solutions, we realized that Azure’s offering – Automation Accounts would serve a good fit for our requirements. This came as a suggestion from one of my teammates. Post evaluation with minimum time constraints we shipped it to production.
Currently, we have 20+ runbooks (or distinct jobs) running each at different frequencies depending on business requirements, and a total of 100+ jobs run in a day with zero failure rates.
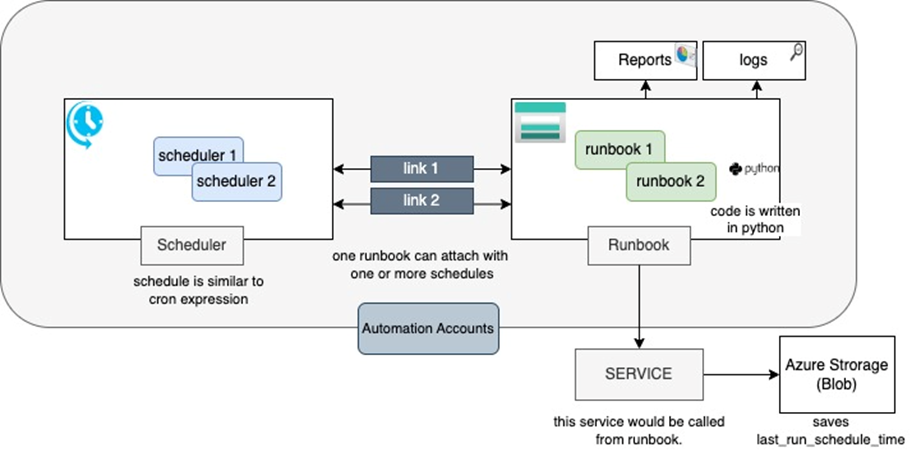
The illustration above depicts the architecture of how we integrated Azure Automation Accounts for our Job Scheduler. It has three major components:
This is where schedules are written at hourly, monthly or specific time intervals.
This will run your job as per given schedules.
This is the main code block where the actual job is registered.
We have written Python script to call relevant service when runbook is invoked.
It stores the last run scheduled time.
Also, it helps to re-run those jobs that are based on the last processed data using timestamp fetched from the Azure blob storage.
Listed down the implementation of Azure Automation Accounts.
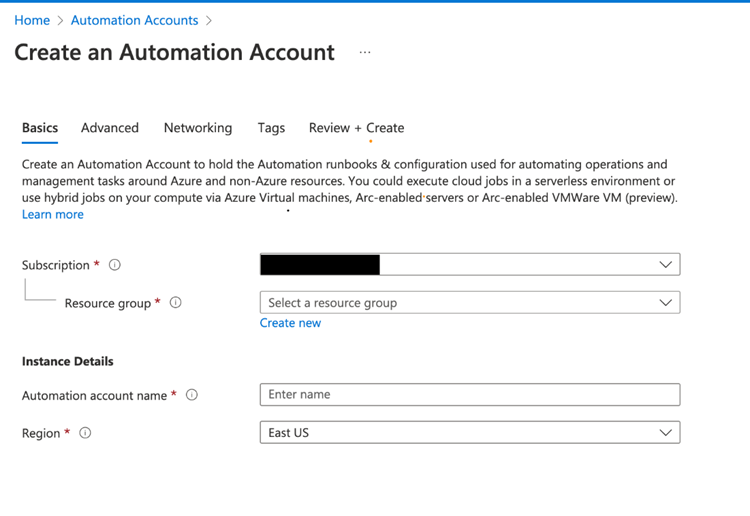
STEP 1:
Create an Automation Account under your subscription.
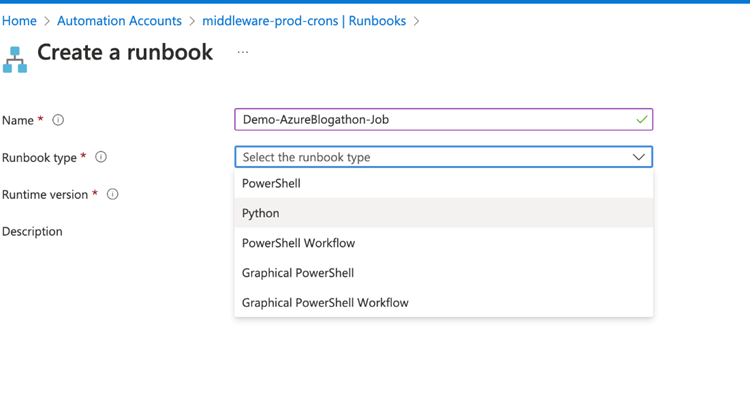
STEP 2:
Create a Runbook. For example, here we have created the Demo-AzureBlogathon-Job. Remember to select the type. We have chosen Python and its latest version.
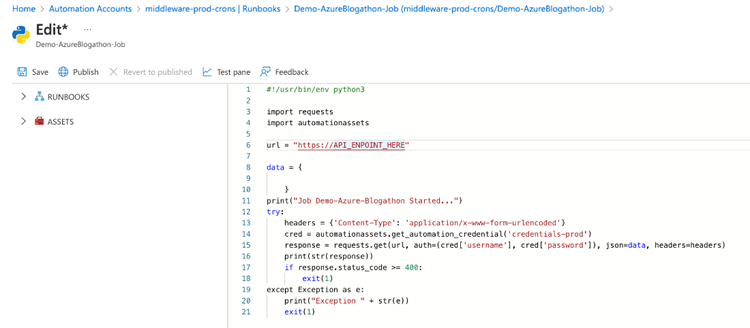
STEP 3:
Edit your Python script as given below. Here we are calling our internal service. At first, we fetch the credentials and pass them as headers, and then call our required endpoint. Information on setting up the credentials is given in Step 5.
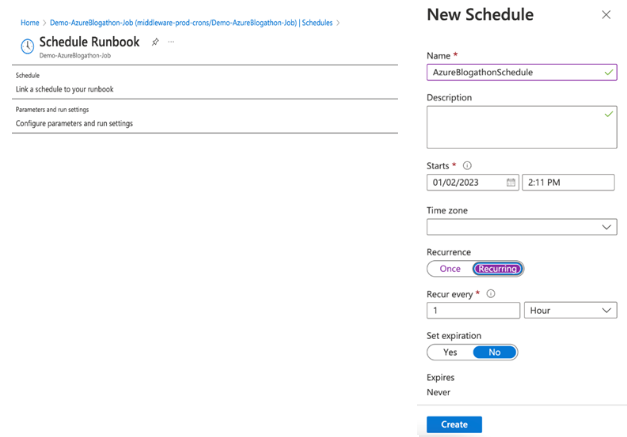
STEP 4:
Create a schedule for running the runbook. It could either be a specific time period or frequency. Link a schedule to your runbook and then add your Cron as per requirement.
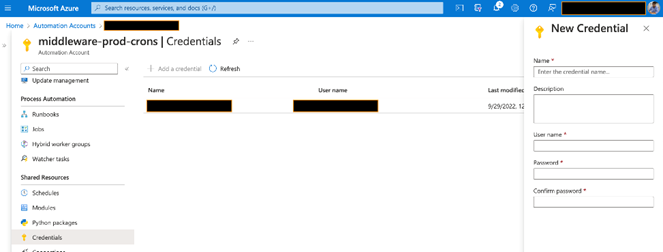
STEP 5:
Go to the Home page of your Automation Account and select credentials in the left panel. Here, you can add your credentials (if any).
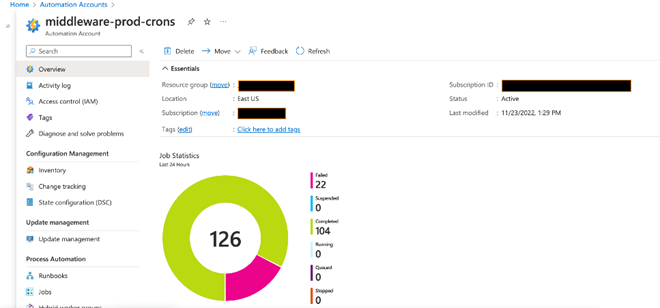
STEP 6:
Go back to the Overview page of Automation Accounts. Here you can see a holistic report of your Jobs (failed, success, queued etc.)
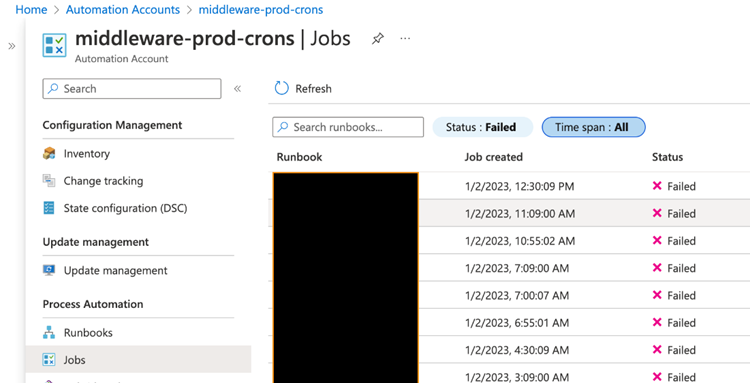
STEP 7:
Suppose any of your Job is not running as expected. Go to the Process Automation tab and select Jobs. You will see the list of all the Jobs along with their status. For debugging you can further select the Job and go to the details page where exceptions (if any) are listed.
Challenges lie with the predefined coding script in the runbook. If you are not comfortable with Python or PowerShell, then you need to learn some basics. Although for this type of Job Schedule one doesn’t need to be highly skilled. Azure already provides a simple interface to work with which is self-explanatory.
It doesn’t provide you with a detailed stack trace hence you need to be careful while editing any of your runbooks. The good part is that it maintains the snapshot version.
There were a couple of business advantages we achieved using this approach which are as follows:
Faster to develop.
Ease of debuggability.
Handy reports.
Reliable tool.
Anything that reduces developers’ time is a huge thumbs-up for any business as it provides ample opportunity to scale. For our business, eventual consistency is necessary because we have 10+ components where data flows to and from. This led us to pick the Azure offering.


Sign up with your email address to receive news and updates from InMobi Technology